Hey, here are a pair of terms it took me way too long to really get comfortable explaining. When talking about printing cards or punches or… well, anything that gets cut, really, the idea of Cut and Bleed.
First, a diagram!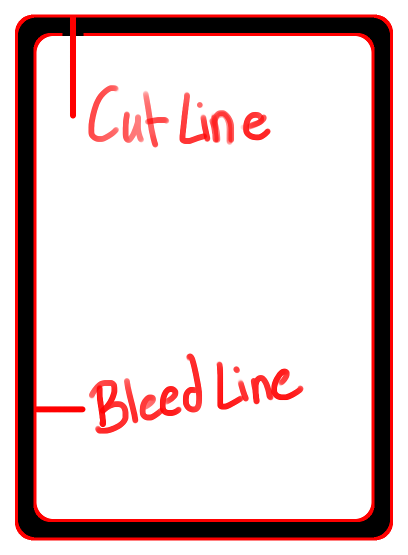
The outermost line is the cut line. You’ll find that the templates you work with are much bigger than that, they provide space outside the cut line. Then, the smaller line on the inside is the bleed line.
The nature of the Cut Line is that that’s literally it: it’s the line that the machines cut. That cut however, can’t guarantee it’s perfect every time, because we are dealing with physical objects that get moved around at speed. Sometimes things will be a little skewiff. Good machines have smaller chances of smaller skew, but it still happens.
The Bleed line took me a little longer to get. Basically, your bleed area is the area between the cut line and the bleed line, and that’s the area that the machine may drift what it prints. What this means is that if you put text outside of the bleed area, it runs the risk of, if a card gets printed skewed, being cut off the edge of the card.
That’s the simplest explanation for cut and bleed lines: Your cut line is the absolute outline of the card. Your bleed line is the region you should be using for anything detailed. If it falls in the region between the two it should be purely decorative, low-detail and inessential to the game’s play.